
How to Set Up a Refurbished Laptop: Step by Step for New Owners
Your refurbished laptop just arrived. The box is open, the laptop is in front of you, and now you are wondering what to do first. Setting up a refurbished laptop is straightforward, but there are a few steps that make a real difference in how well it runs from day one.
Here is exactly what to do from the moment you take it out of the box.
Step 1: Inspect It Before Turning It On
Before pressing the power button, spend two minutes checking the physical condition.
Open and close the lid a few times to feel whether the hinge is smooth and firm. A hinge that flops open or feels loose is worth noting before you start using it.
Check every port. USB ports, HDMI, audio jack, and the charging port should all be free of debris and damage. Run your finger lightly around each opening.
Look at the screen with the laptop open and at an angle under a light. Check for any scratches, pressure marks, or spots that look different from the rest of the panel.
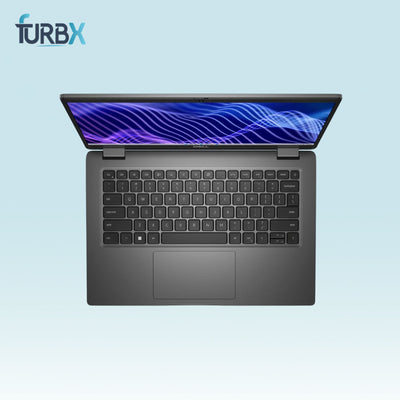
Check the keyboard. Press a few keys and confirm they spring back properly. Run your fingers across the surface and look for any missing or damaged keys.
If anything does not match what the listing described, photograph it immediately and contact the seller before proceeding. Documenting issues on arrival protects you if a warranty claim becomes necessary.
Step 2: Charge It Fully Before First Use
Plug in the charger and let the battery charge completely to 100 percent before using the laptop on battery power for the first time.
This is a small step that helps calibrate the battery indicator accurately, so you get a reliable reading of the remaining charge during daily use.
While it charges, move on to the next steps.
Step 3: Check What Operating System Is Installed
Most refurbished laptops ship with Windows already installed and activated. Turn the laptop on and confirm which version of Windows is running.
Click the Start button, then go to Settings > System > About.
You will see the Windows edition and whether it is activated. It should say Activated under Windows Specifications if everything is set up correctly.
If Windows is not activated, contact the seller immediately, as this should be included with any properly refurbished laptop.
Step 4: Run Windows Update Right Away

Before installing anything else, run Windows Update to make sure the operating system has all current security patches and driver updates.
Go to Settings > Windows Update > Check for Updates.
This process can take anywhere from ten minutes to over an hour, depending on how many updates are pending. Let it complete fully and restart when prompted before moving on.
Do not skip this step. Running an outdated version of Windows creates security vulnerabilities that put your data at risk from day one.
Step 5: Update All Drivers
Drivers are small software programs that tell Windows how to communicate with the laptop's hardware. Outdated drivers can cause problems like audio failures, display issues, and wireless connection drops.
For Dell laptops: Go to dell.com/support, enter your Service Tag number found on the bottom of the laptop, and download all recommended driver updates.
For HP laptops: Go to support.hp.com, enter your product number found on the bottom label, and download HP Support Assistant, which automatically manages driver updates.
For Lenovo laptops: Go to support.lenovo.com and use the Lenovo System Update tool to find and install all current drivers for your model.
Run all driver updates and restart the laptop after they are complete.
Step 6: Check Battery Health

Now that the laptop is fully charged and updated, check the actual battery health to confirm it matches what the seller described.
Open Command Prompt by searching for cmd in the Start menu.
Type the following command exactly and press Enter:
powercfg /batteryreport
This generates a battery report saved to your user folder. Open the report in a browser and look for the Battery Capacity History section.
Compare the Design Capacity with the Full Charge Capacity. If the Full Charge Capacity is 80 percent or more of the Design Capacity, the battery is in good condition for regular daily use.
Take a screenshot of this report and save it for your records in case you ever need it for a warranty claim.
Step 7: Run a Basic Performance Test
Before loading the laptop with your personal files and software, perform a quick performance check to confirm everything is working correctly.
Open Task Manager by pressing Ctrl + Shift + Esc.
Click the Performance tab and check the CPU, Memory, and Disk usage while the laptop is idle. CPU usage should remain low, Memory should show plenty of available RAM, and Disk activity should be close to zero when nothing is running.
Open a browser and visit speedtest.net to verify that your wireless connection is performing normally.
Play a short video to confirm both speakers are working properly.
Plug a device into a USB port to ensure it is detected correctly.
If anything fails these basic checks, document the issue and contact the seller while you are still within the warranty period.
Step 8: Set Up Security Before Anything Else
Before storing any personal or business information on the laptop, configure the essential security settings.
Create a strong Windows password or enable Windows Hello with fingerprint or facial recognition if your laptop supports it.
Turn on Windows Defender if it is not already enabled by going to Settings > Privacy & Security > Windows Security.
Enable the firewall under Windows Security > Firewall & Network Protection.
If you plan to store sensitive personal or business data, consider enabling BitLocker Drive Encryption by going to Control Panel > System and Security > BitLocker Drive Encryption.
Step 9: Install Your Essential Software
Now the laptop is ready for everyday use. Install the software you use most often, such as your preferred web browser, Microsoft Office or an alternative office suite, PDF reader, video conferencing apps, cloud storage tools, and any work-specific applications.
Install software only from official websites to reduce the risk of malware or unwanted programs. Once your essential applications are installed, restart the laptop one final time and verify that everything opens and runs properly.
With these steps completed, your refurbished laptop is fully updated, secure, and ready for reliable daily use.
Browse our tested and graded selection at FurbX